¶ Print one-off label (test Printer and ZPL Template)
You can test the printer and ZPL template by using one-off print functionality. All information should be entered by you.
Print one-off label by doing the following:
- In main menu, select the Printing menu option
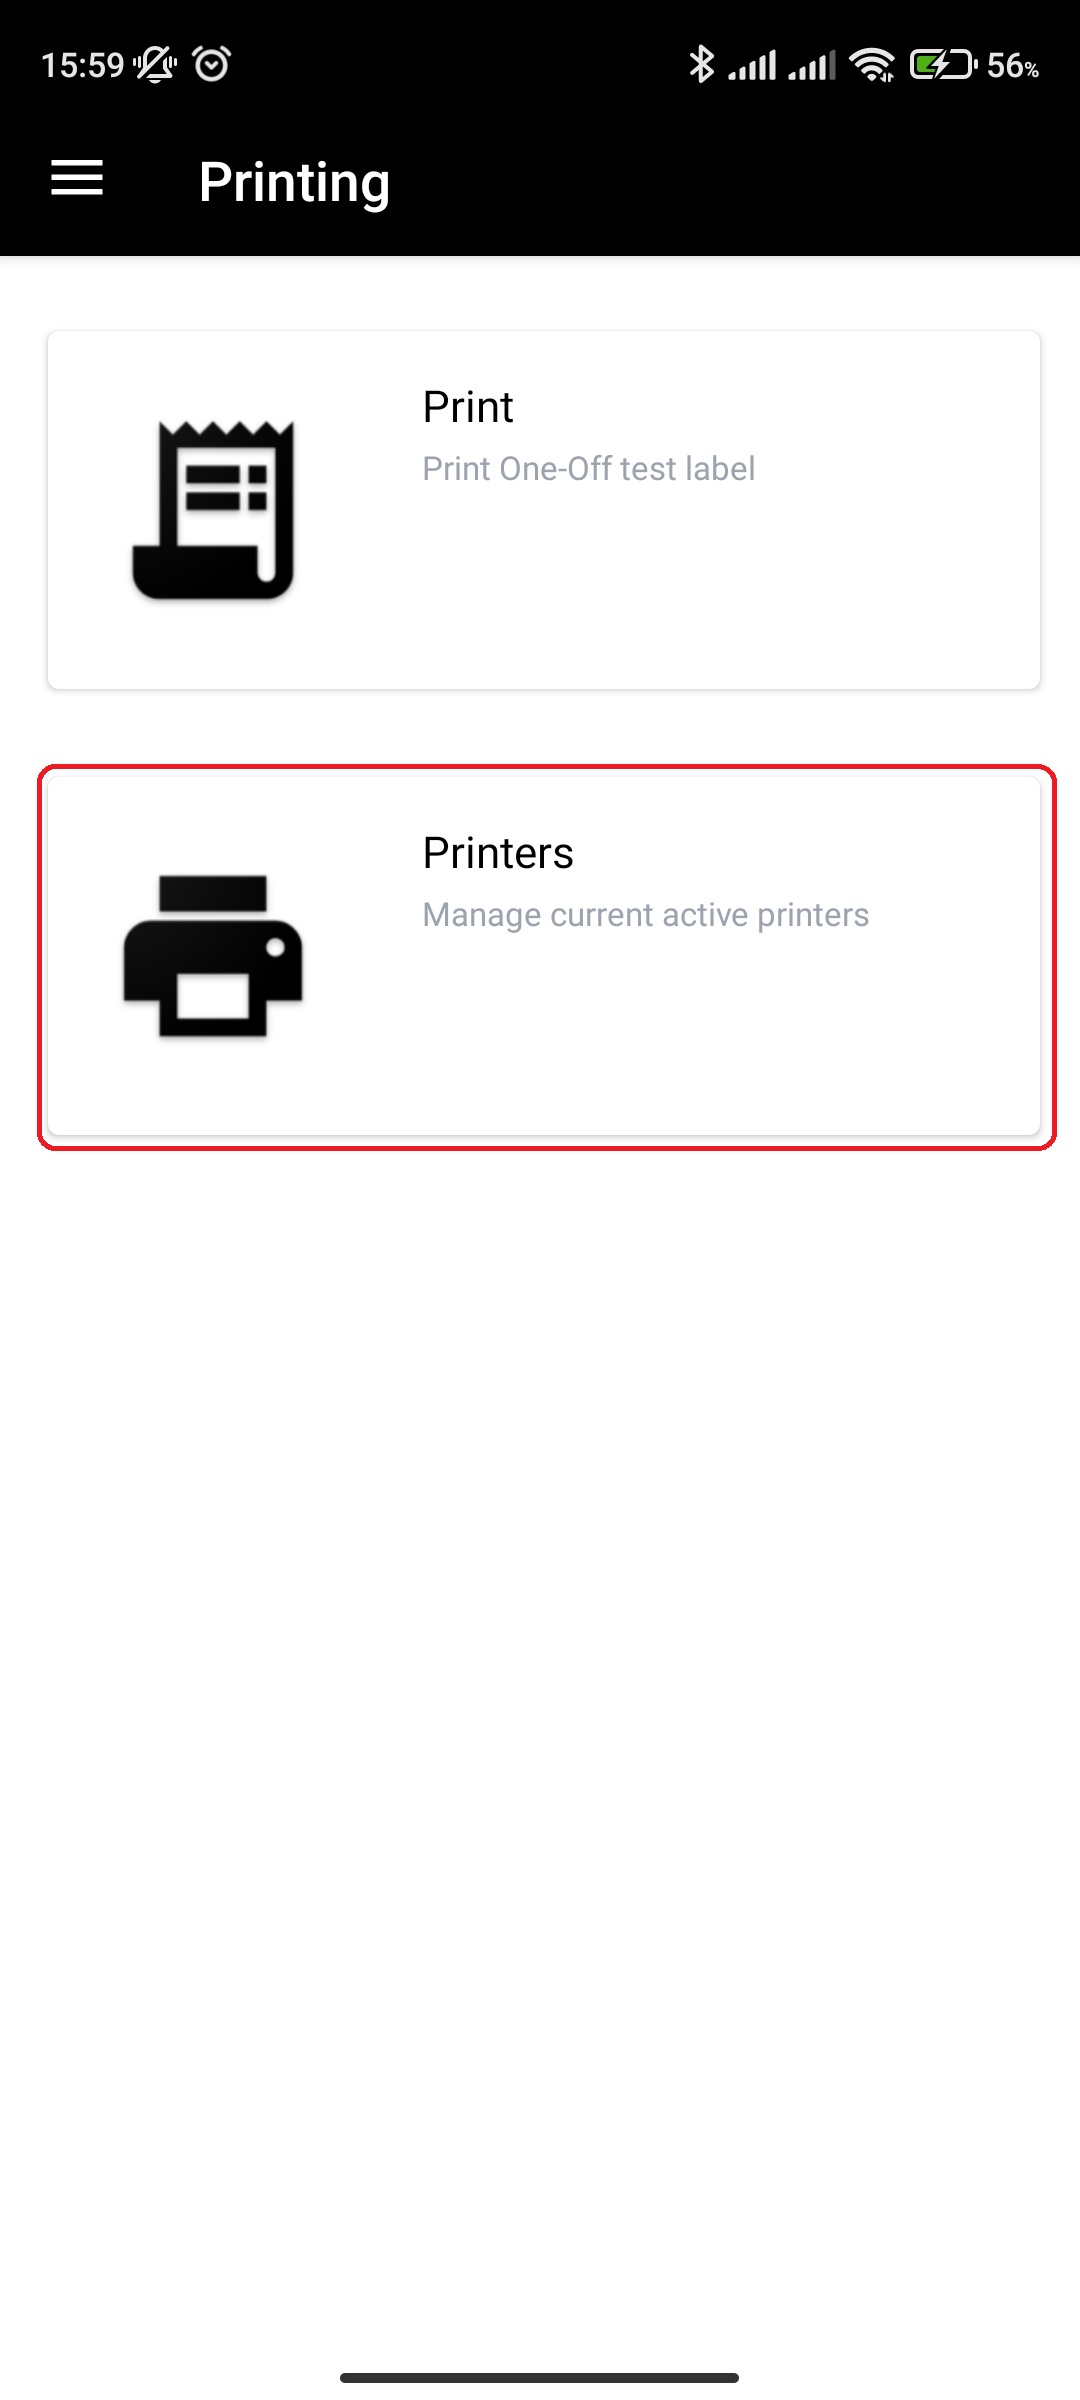
- Select Print option
- Select one of ZPL Templates assigned to your account
- Input the values available from the ZPL Template
- Click Print
¶ Printers
¶ Connect to Zebra label printer
You can connect to the Zebra label printer by bluetooth. Connected printer will be used throughout the app session.
Connect to printer by doing the following:
- In main menu, select the Printing menu option
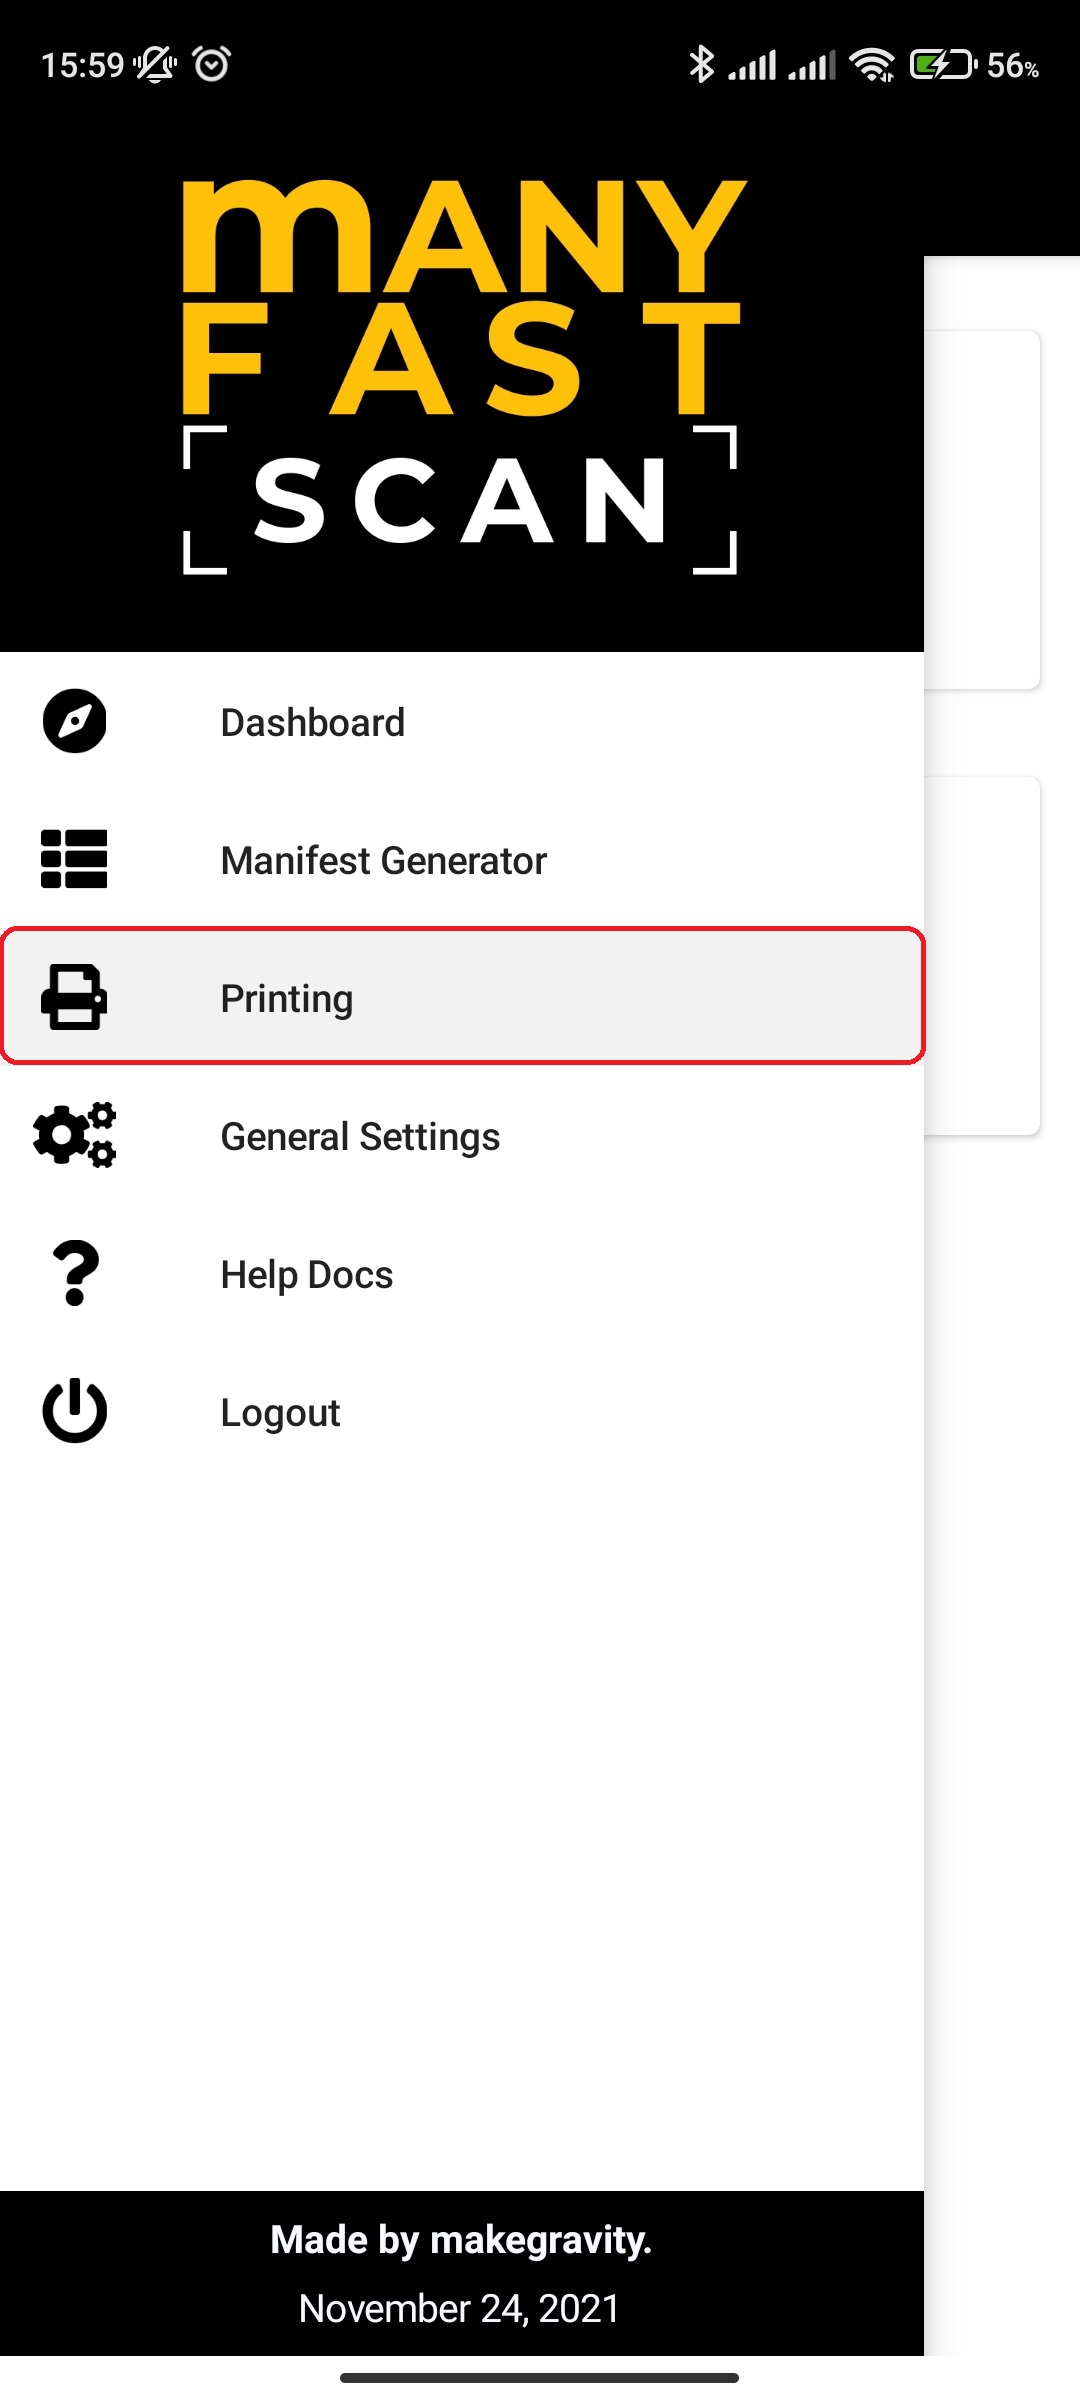
- Select Printers option
- Click Connect to New Printer
- You will be prompted to connect to label printer
- Android
- To successfully connect to Zebra label printer, you must allow the app access to bluetooth when prompted.
- You must have bluetooth enabled in your settings
- Click Refresh Printers button if you have no found results
- When printer shows up, select it and click „Connect to Selected Printer“
- iOS
- You must connect to Zebra label printer from your iOS system settings
- Click „Refresh Printers“ button when you connect to printer from settings
- When printer shows up, select it and click „Connect to Selected Printer“
- Android
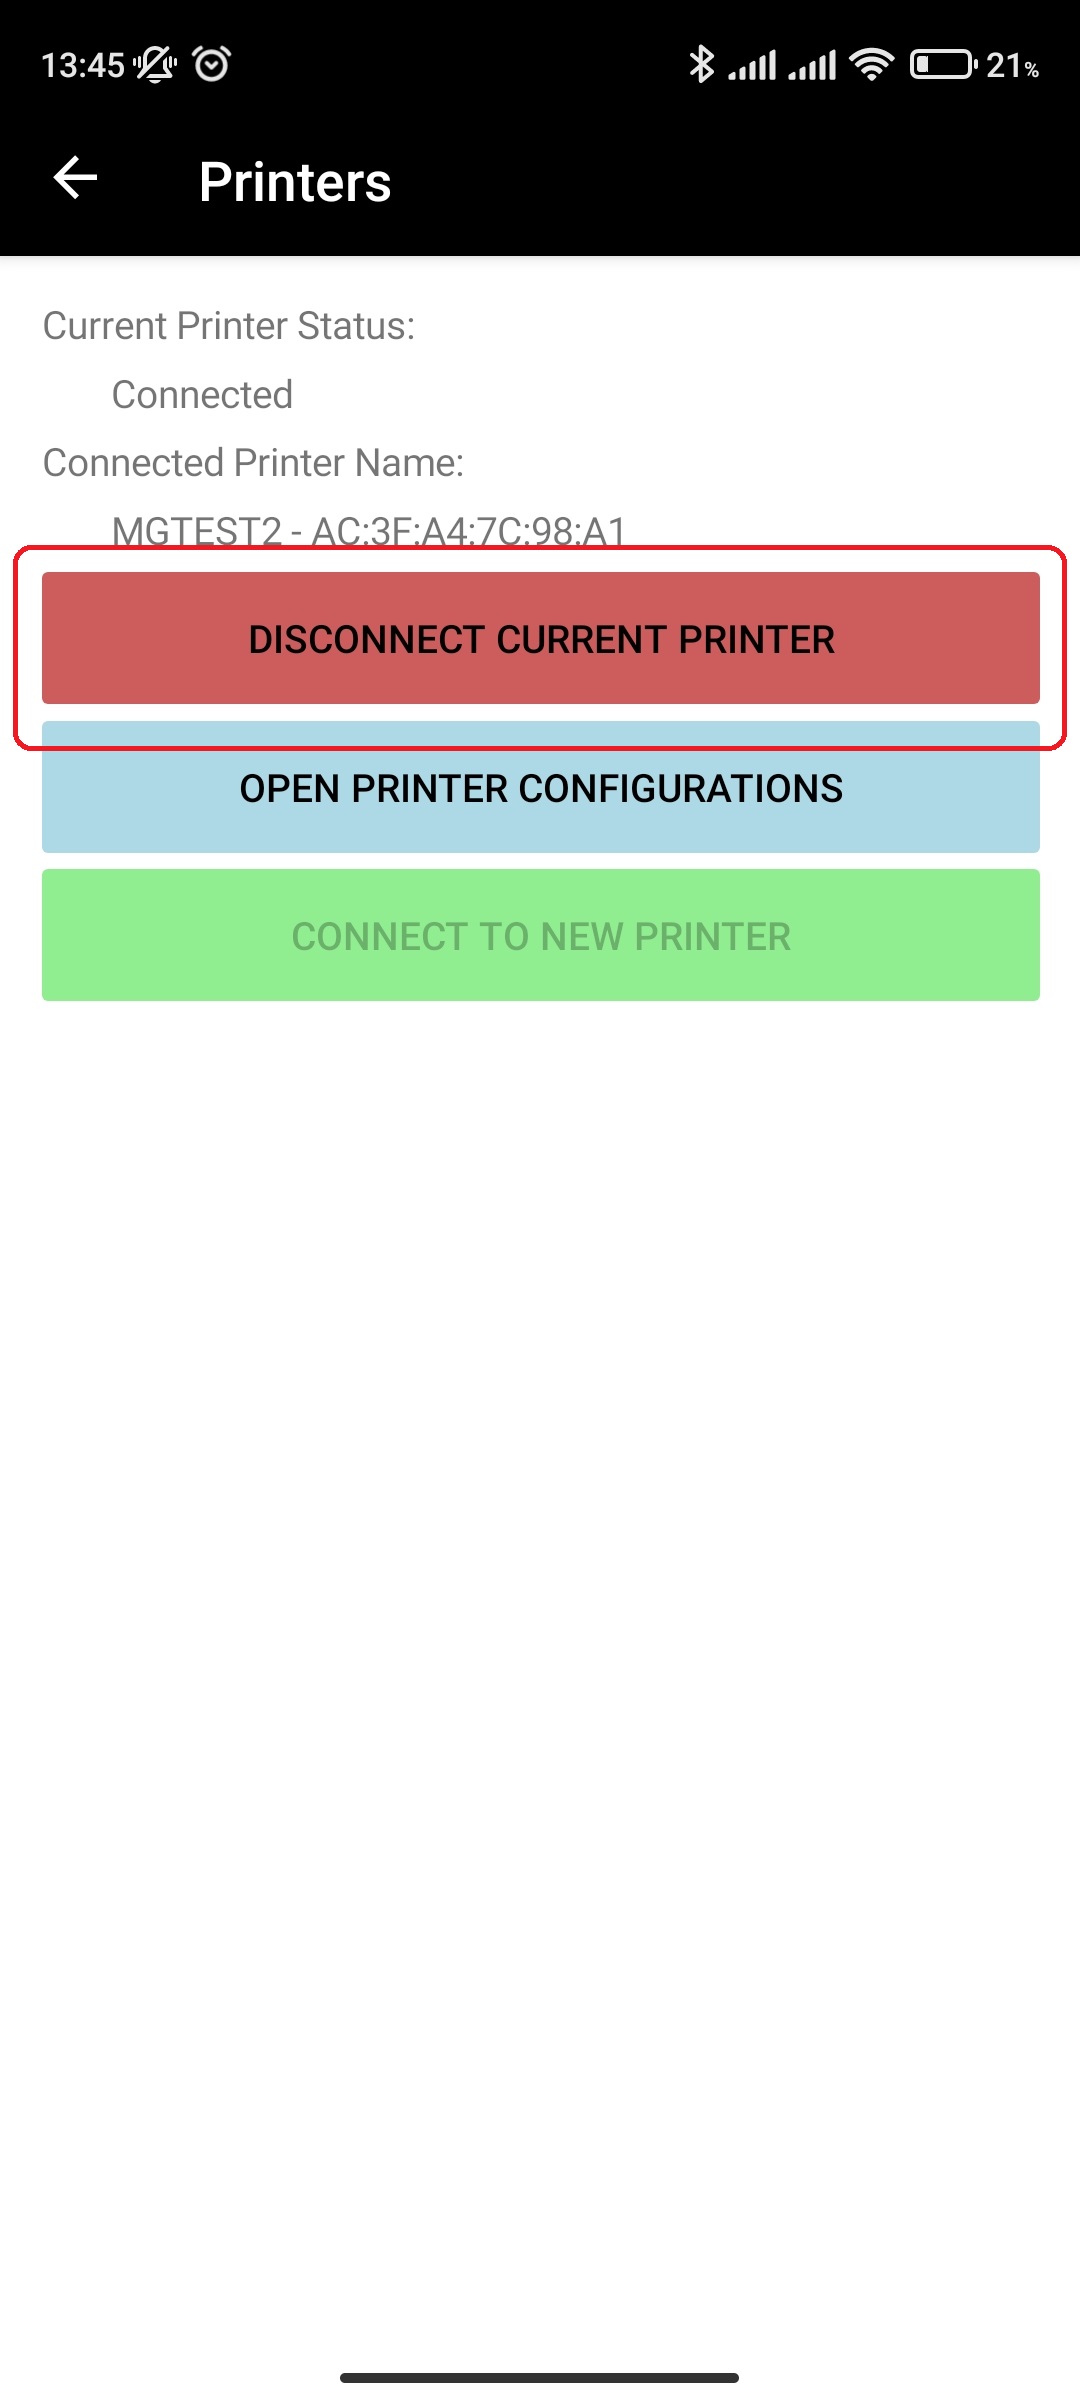
- On successful connection, you should see the Current Printer Status as well as Connected Printer Name change
¶ Video Guide
¶ Disconnect from Zebra label printer
You can disconnect from Zebra label printer. Disconnected printer will not be used anymore throughout the app session.
Disconnect from printer by doing the following:
- In main menu, select the Printing menu option
- Select Printers option
- Click Disconnect Current Printer
¶ Printer Configuration
After you are connected to the printer, you can access the printer configuration options.
Options and their descriptions:
- Print Test Label
- Prints the test label. Used to verify if the connection to printer is fully working
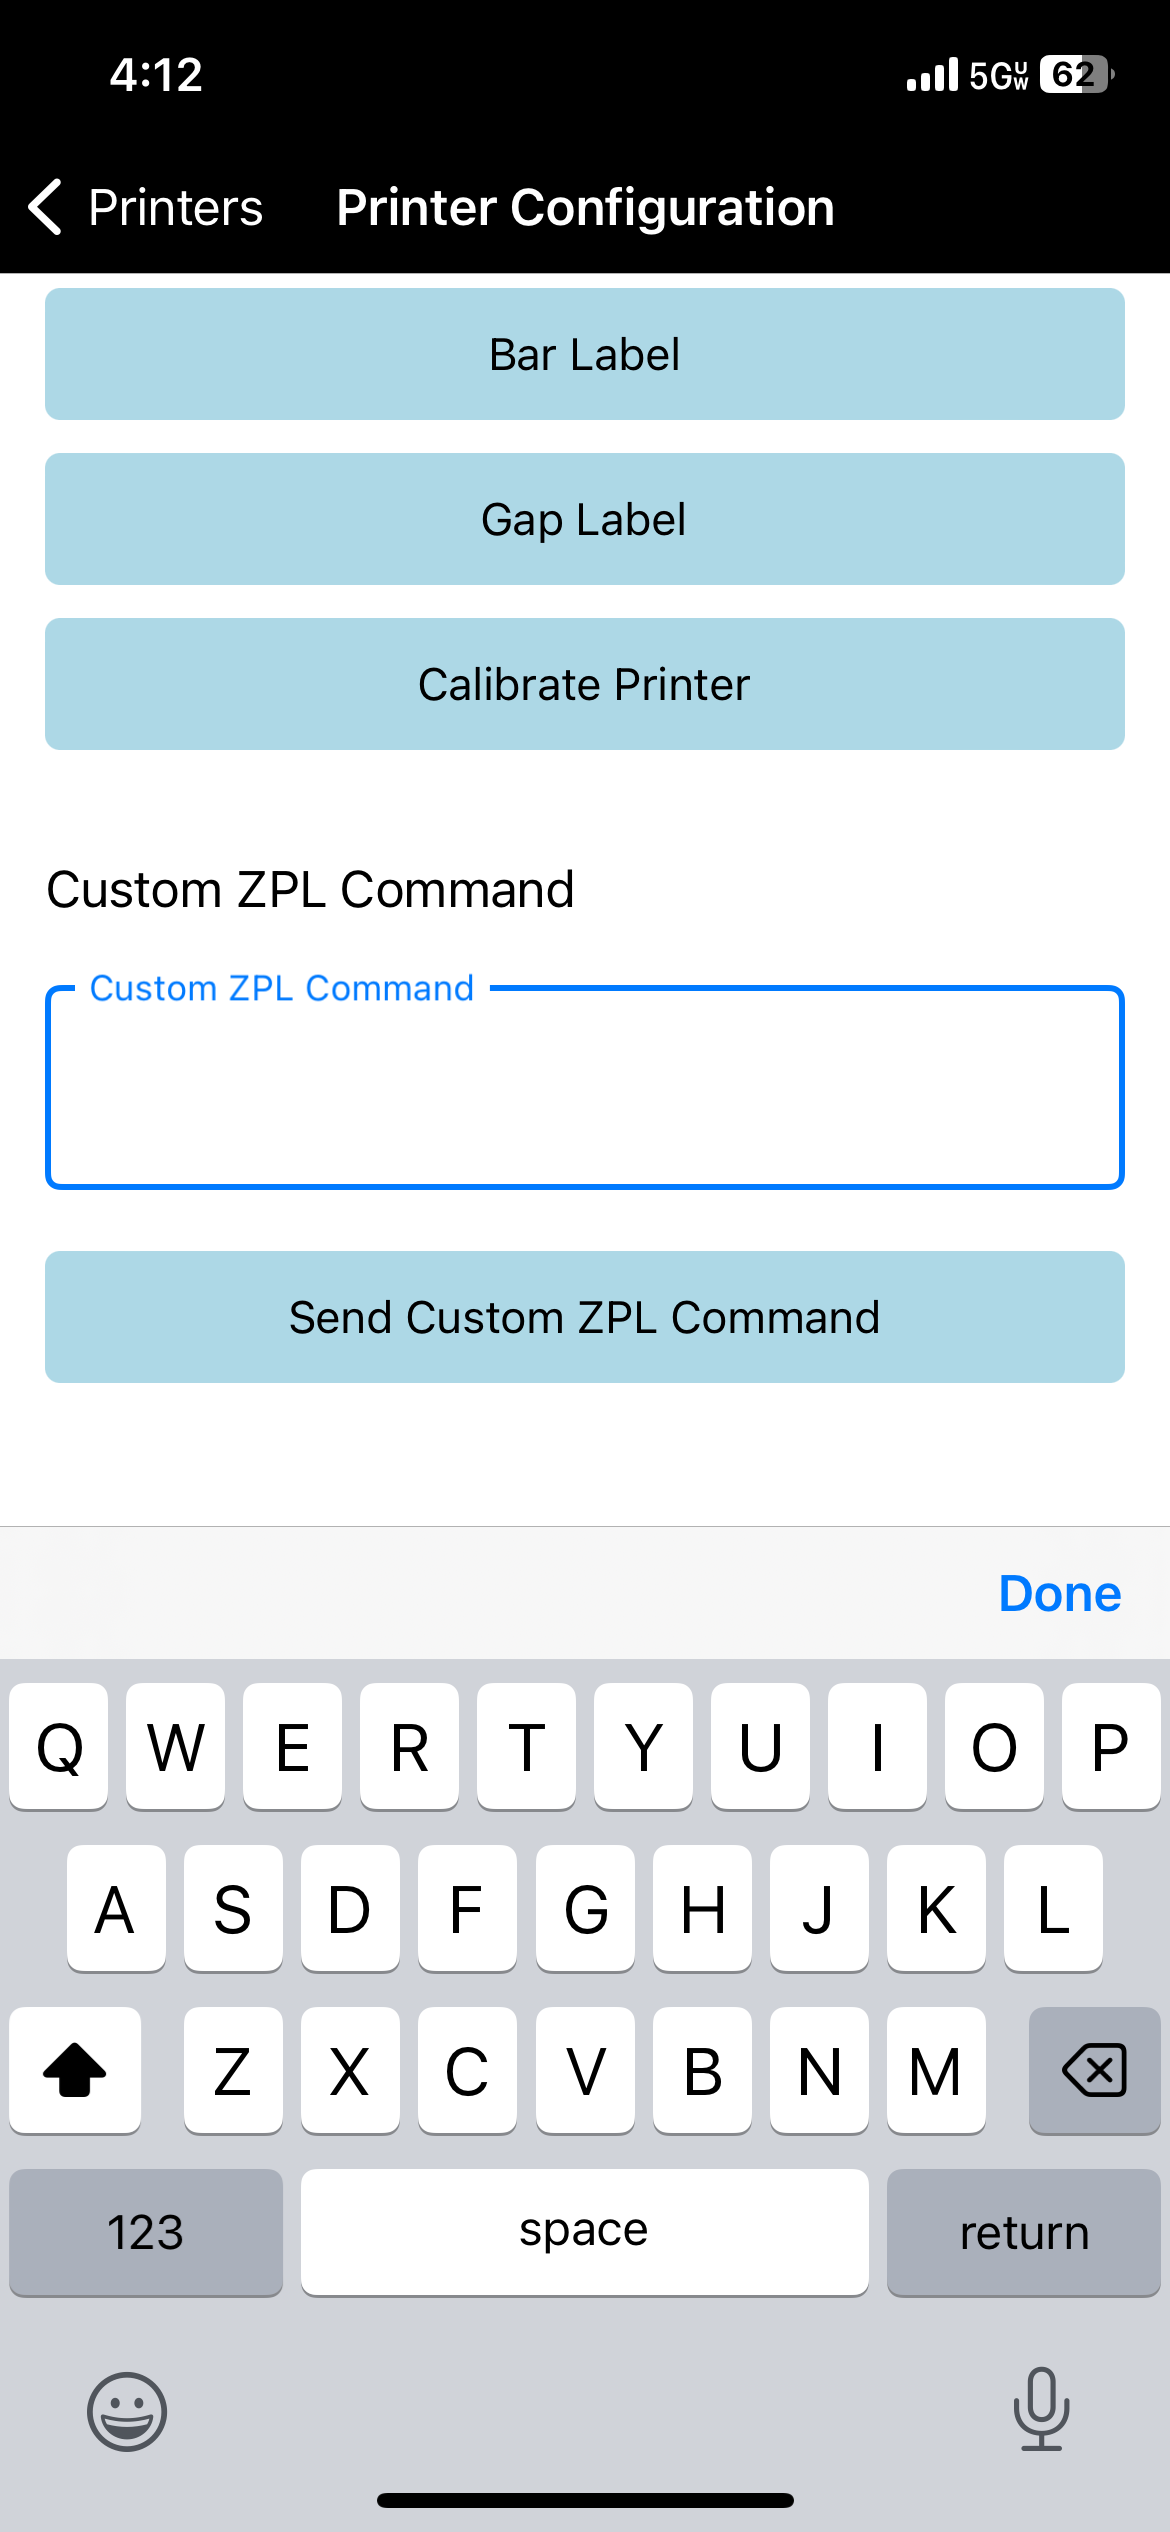
- Bar Label
- Sends the command to printer to use the bar as media sensing mode
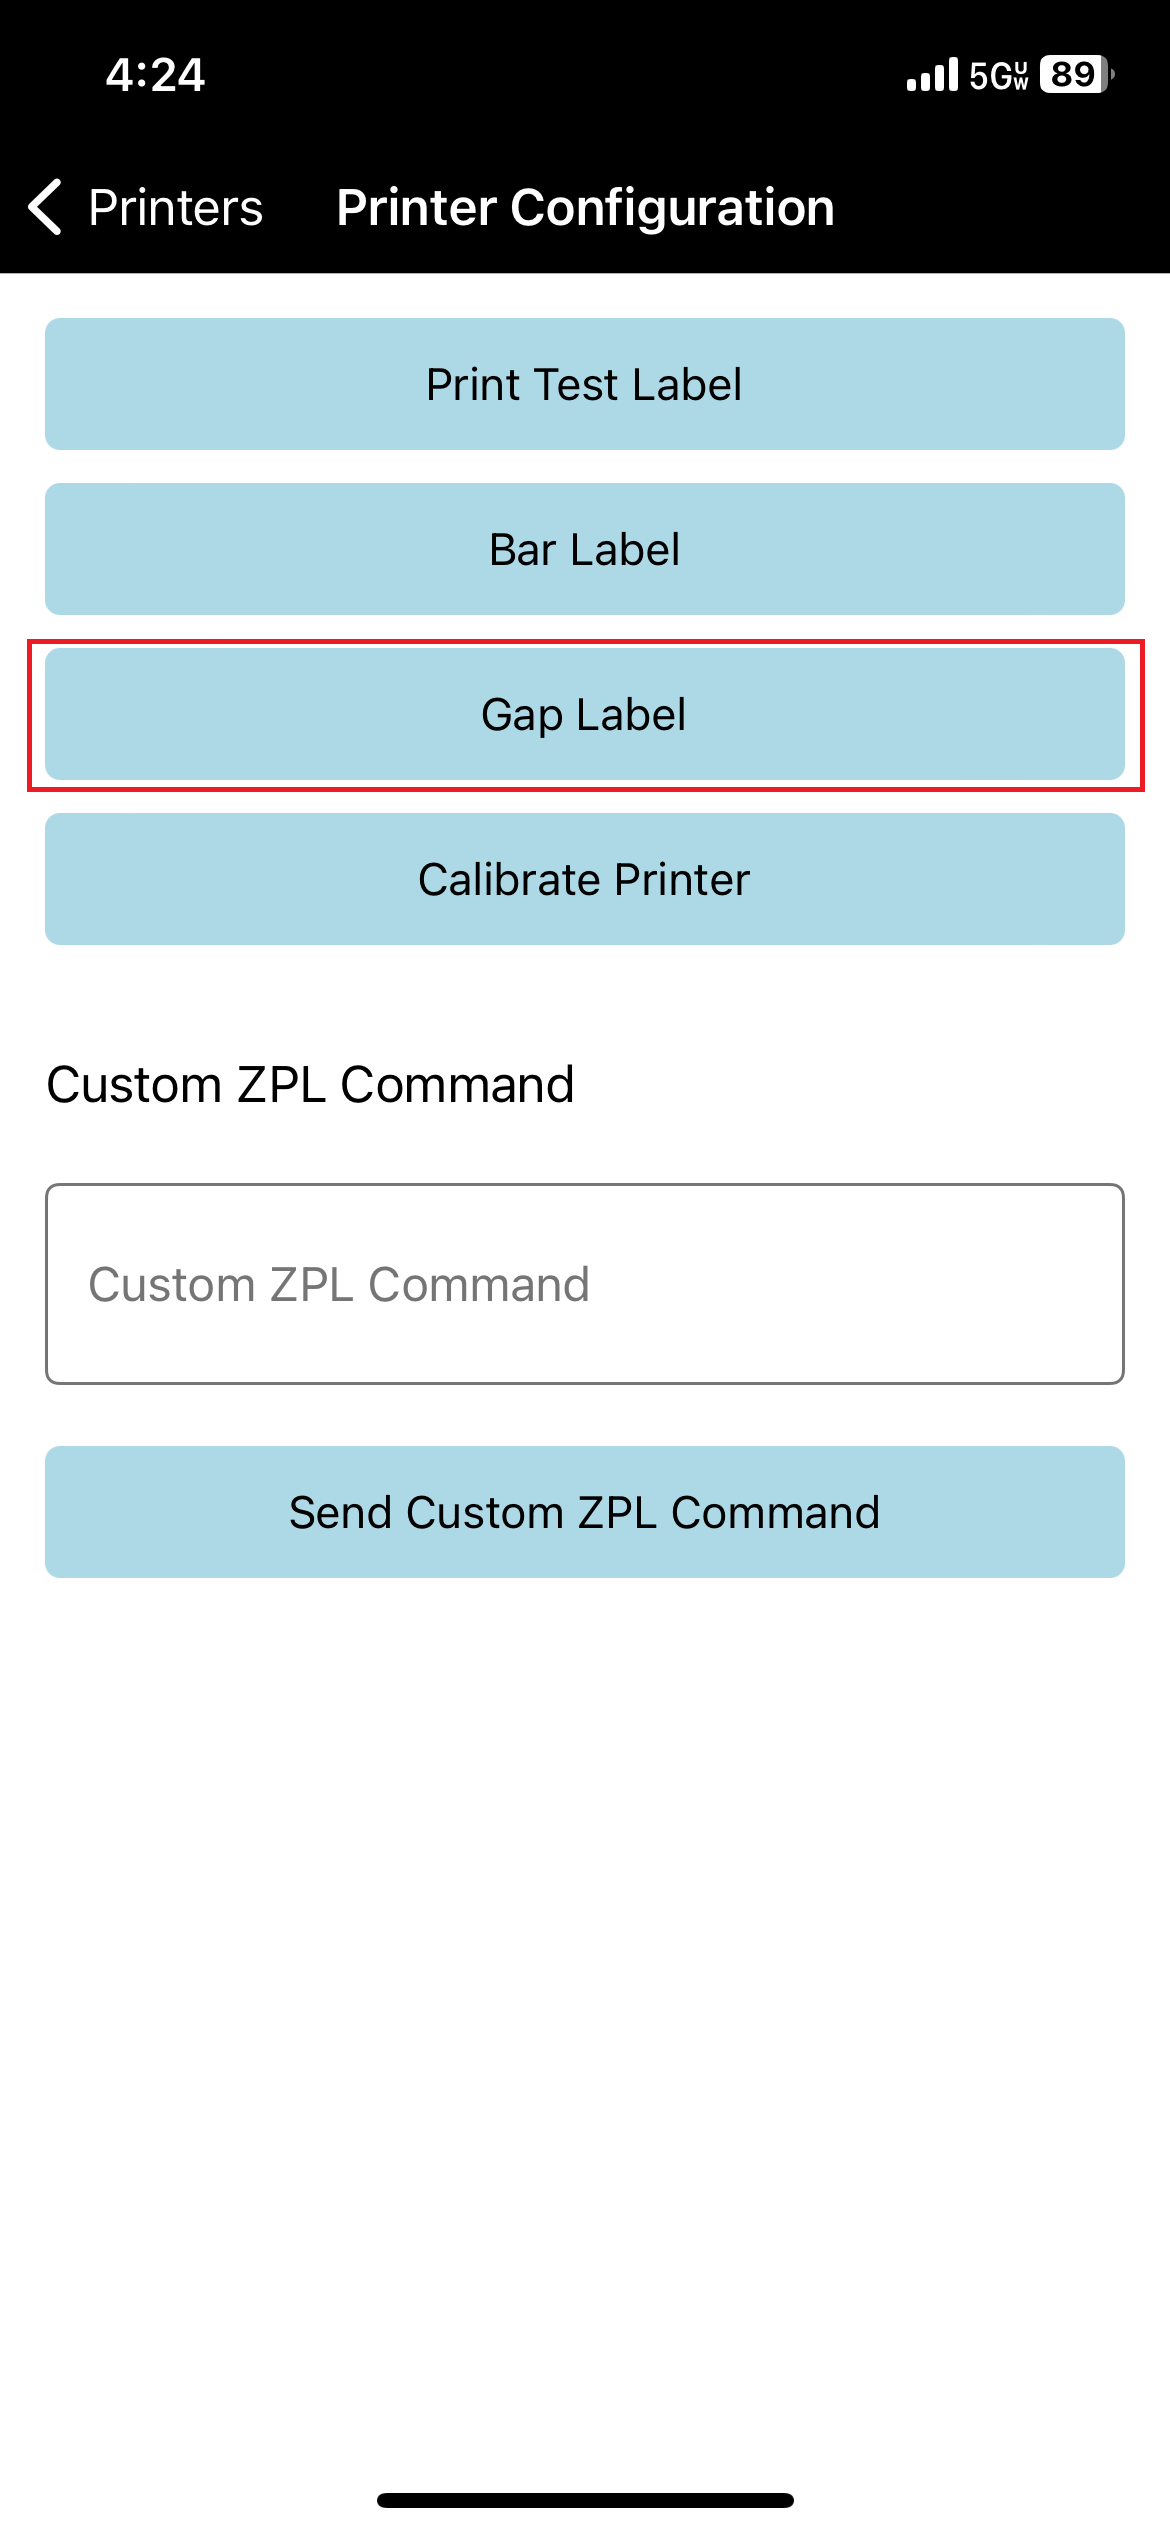
- Gap Label
- Sends the command to printer to use the gap as media sensing mode
- Calibrate Printer
- Calibrates and resets the printer
Please note that executing some of the commands causes the manyfastScan to lose connection with the printer. You will need to re-connect if the connection is lost.
Access the printer configuration by doing the following:
- In main menu, select the Printing menu option
- Select Printers option
- If you aren't, connect to the printer
- Click on Open Printer Configuration
.jpg?style=centerCustomCss)
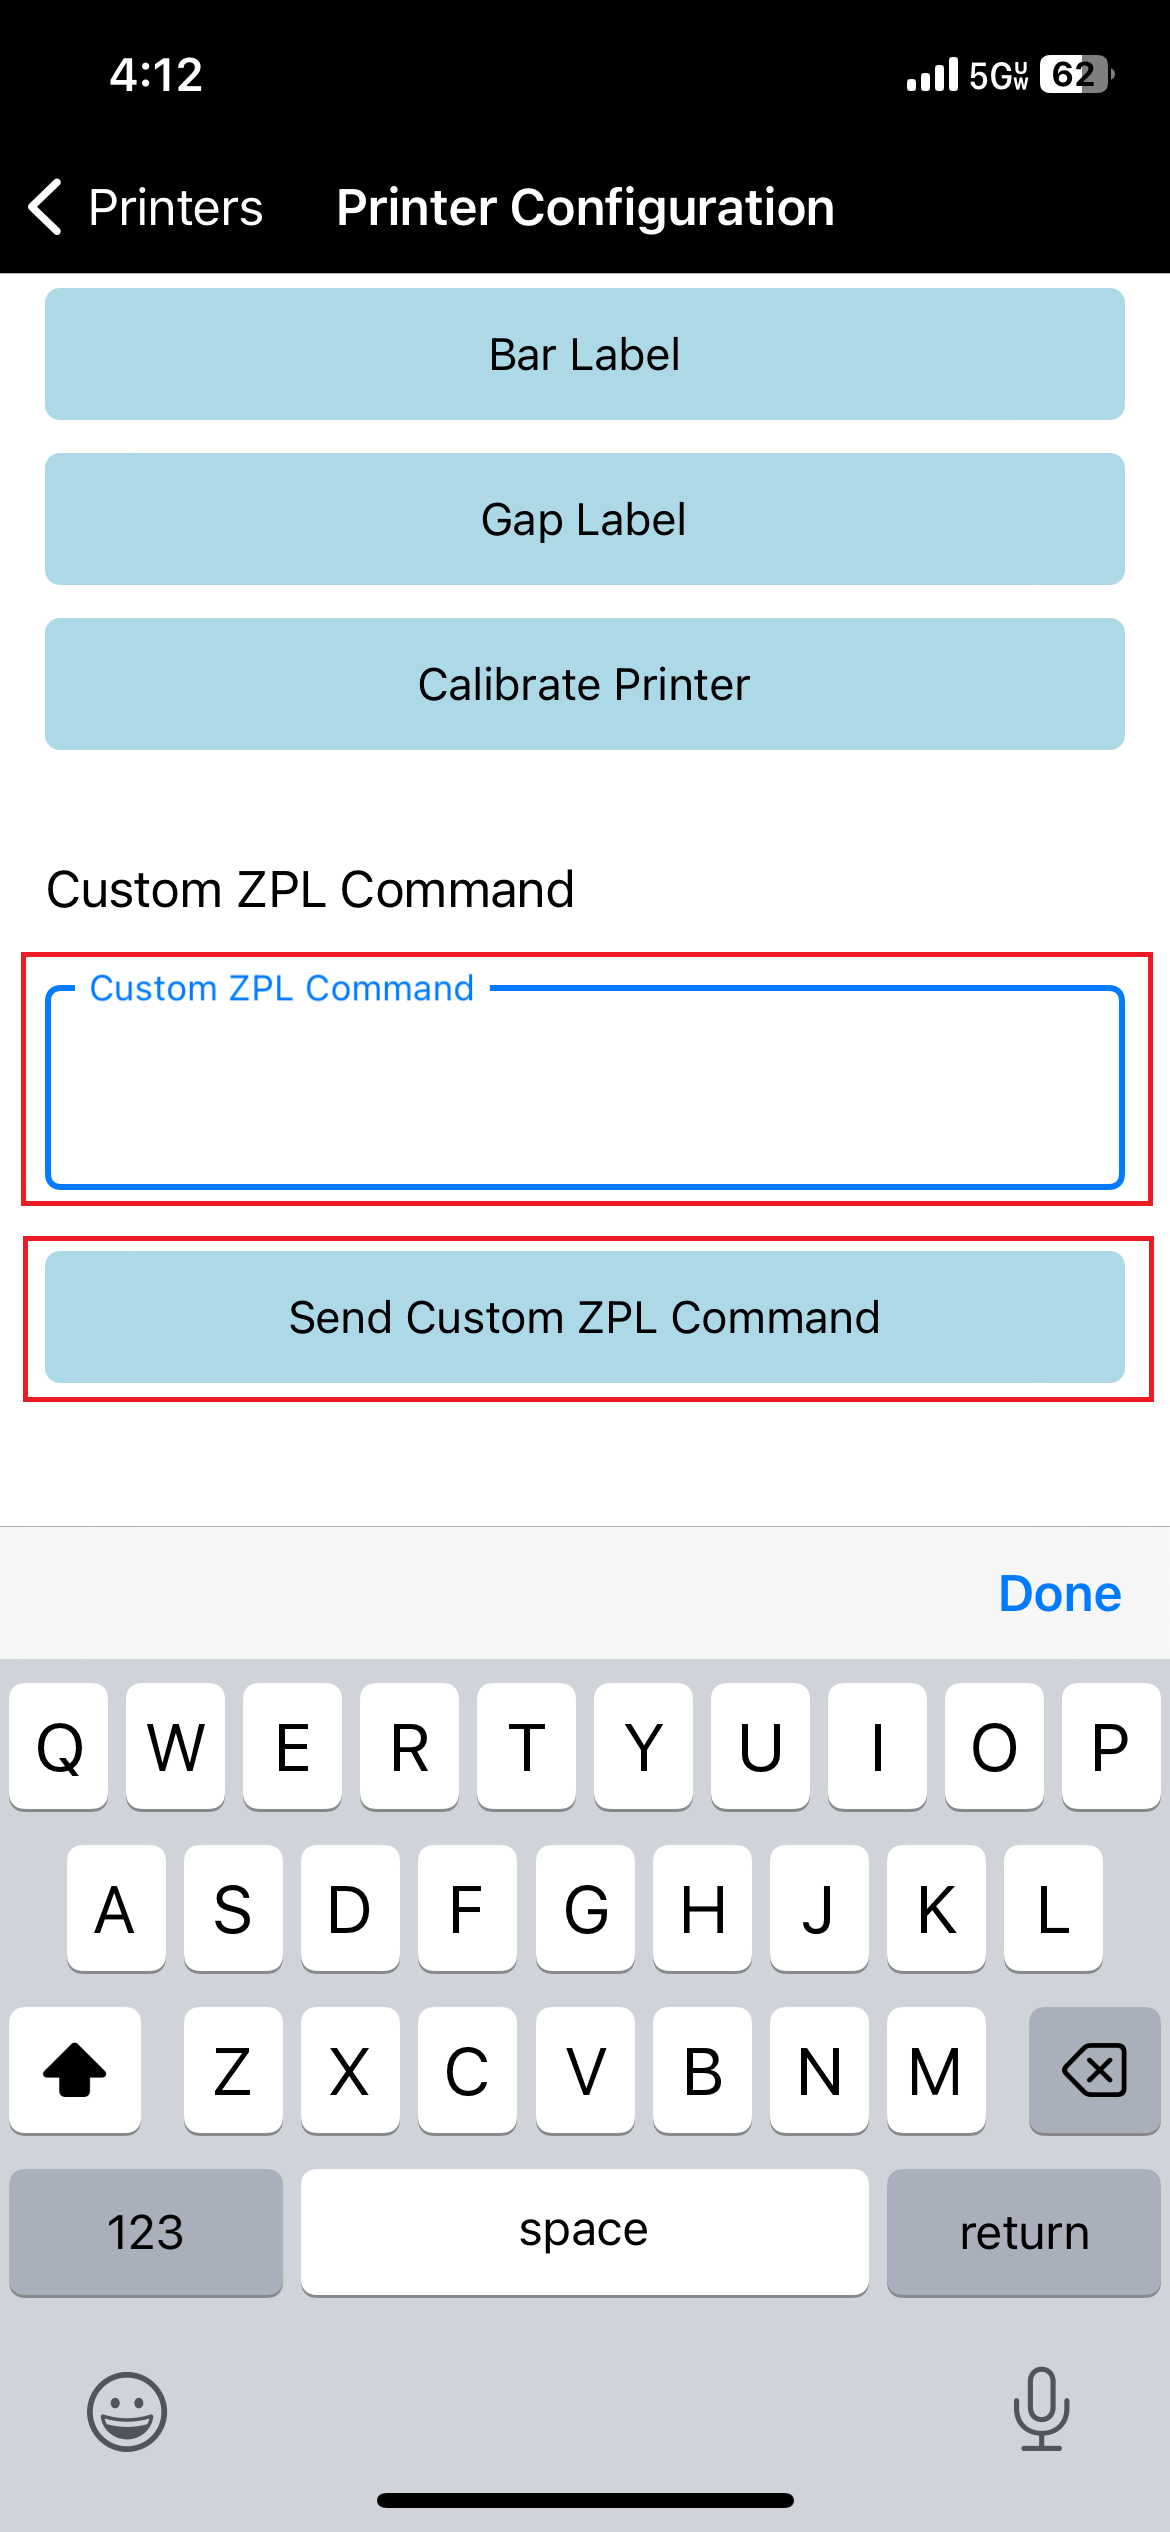
¶ Custom ZPL Commands
The language used to program Zebra printers is called ZPL. There are some helpful commands you can use to configure the printer setup. Follow the steps above to connecting to the printer and Open Printer Configuration
- Click on Open Printer Configuration
- Copy the ZPL code you want to send to the printer (see commonly used ZPL below) and click Send Custom ZPL Command
¶ Commonly Used ZPL Commands
- Change the auto-shutoff time. Copy the entire code and paste in the Custom ZPL Command textbox and click Send Custom ZPL Command
The timeout is measured in seconds. The example below is set to 1200 seconds or 20 minutes. To completely disable the auto-shutoff change the time from 1200 to 0
! U1 setvar "power.inactivity_timeout" "1200"
! U1 do "device.reset" ""
¶ Android App Printer Connection Issues - Permissions
If you find yourself repeatedly receiving permission prompts without actually being asked by Android to grant permissions, please refer to the following guides to verify your permission settings and correct any issues.
Additionally, you can watch instructional videos tailored to your Android device's version.
If the videos aren't resolving your issues, please get in touch with the support.
Android 12 or newer versions
Android 11 or older versions
¶ Changing Label Sizes
The first step to changing the label size, is to follow the below steps. If you have previously used a different label size, please follow the instructions below to enable the printer to switch sizes. Once this is done, follow these instructions to set the printer to print on the enabled size.
¶ Switching to 3" x 2" Labels
You can connect to the Zebra label printer by bluetooth. Connected printer will be used throughout the app session.
Connect to printer by doing the following:
- In main menu, select the Printing menu option
- Select Printers option
- If you are not already connected to a printer, Click Connect to New Printer
- You will be prompted to connect to label printer
- Click on Open Printer Configuration
- Copy the ZPL code you want to send to the printer (see commonly used ZPL below) and click Send Custom ZPL Command
! U1 do "file.delete" "AUTOEXEC.ZPL"
^XA
^DFE:AUTOEXEC.ZPL ^FS
^PW406
^MD15
! U1 setvar "ezpl.reprint_mode" "on"
^XZ
! U1 do "device.reset" ""
-
If the label does not have black marks on the liner, click Gap Label and wait for the success message
-
When changing the label size, make sure you select the properly configured ZPL Template when you create your Manifest Group for example, choose 2 x 3 Label Template for Manifest Group

¶ Switching to 2" x 1.25" Labels
You can connect to the Zebra label printer by bluetooth. Connected printer will be used throughout the app session.
Connect to printer by doing the following:
- In main menu, select the Printing menu option
- Select Printers option
- If you are not already connected to a printer, Click Connect to New Printer
- You will be prompted to connect to label printer
- Click on Open Printer Configuration
- Copy the ZPL code you want to send to the printer (see commonly used ZPL below) and click Send Custom ZPL Command
! U1 do "file.delete" "AUTOEXEC.ZPL"
^XA
^DFE:AUTOEXEC.ZPL ^FS
^PW381
^MD15
! U1 setvar "ezpl.reprint_mode" "on"
^XZ
! U1 do "device.reset" ""
- If the label does not have black marks on the liner, click Gap Label and wait for the success message. Otherwise select Bar Label
- When changing the label size, make sure you select the properly configured ZPL Template when you create your Manifest Group for example, choose Template for Manifest Group
¶ Switching to 2" x 3" Labels
You can connect to the Zebra label printer by bluetooth. Connected printer will be used throughout the app session.
Connect to printer by doing the following:
- In main menu, select the Printing menu option
- Select Printers option
- If you are not already connected to a printer, Click Connect to New Printer
- You will be prompted to connect to label printer
- Click on Open Printer Configuration
- Copy the ZPL code you want to send to the printer (see commonly used ZPL below) and click Send Custom ZPL Command
! U1 do "file.delete" "AUTOEXEC.ZPL"
^XA
^DFE:AUTOEXEC.ZPL ^FS
^PW381
! U1 setvar "ezpl.reprint_mode" "on"
^XZ
! U1 do "device.reset" ""
- If the label does not have black marks on the liner, click Gap Label and wait for the success message. Otherwise select Bar Label
- When changing the label size, make sure you select the properly configured ZPL Template when you create your Manifest Group for example, choose Template for Manifest Group